


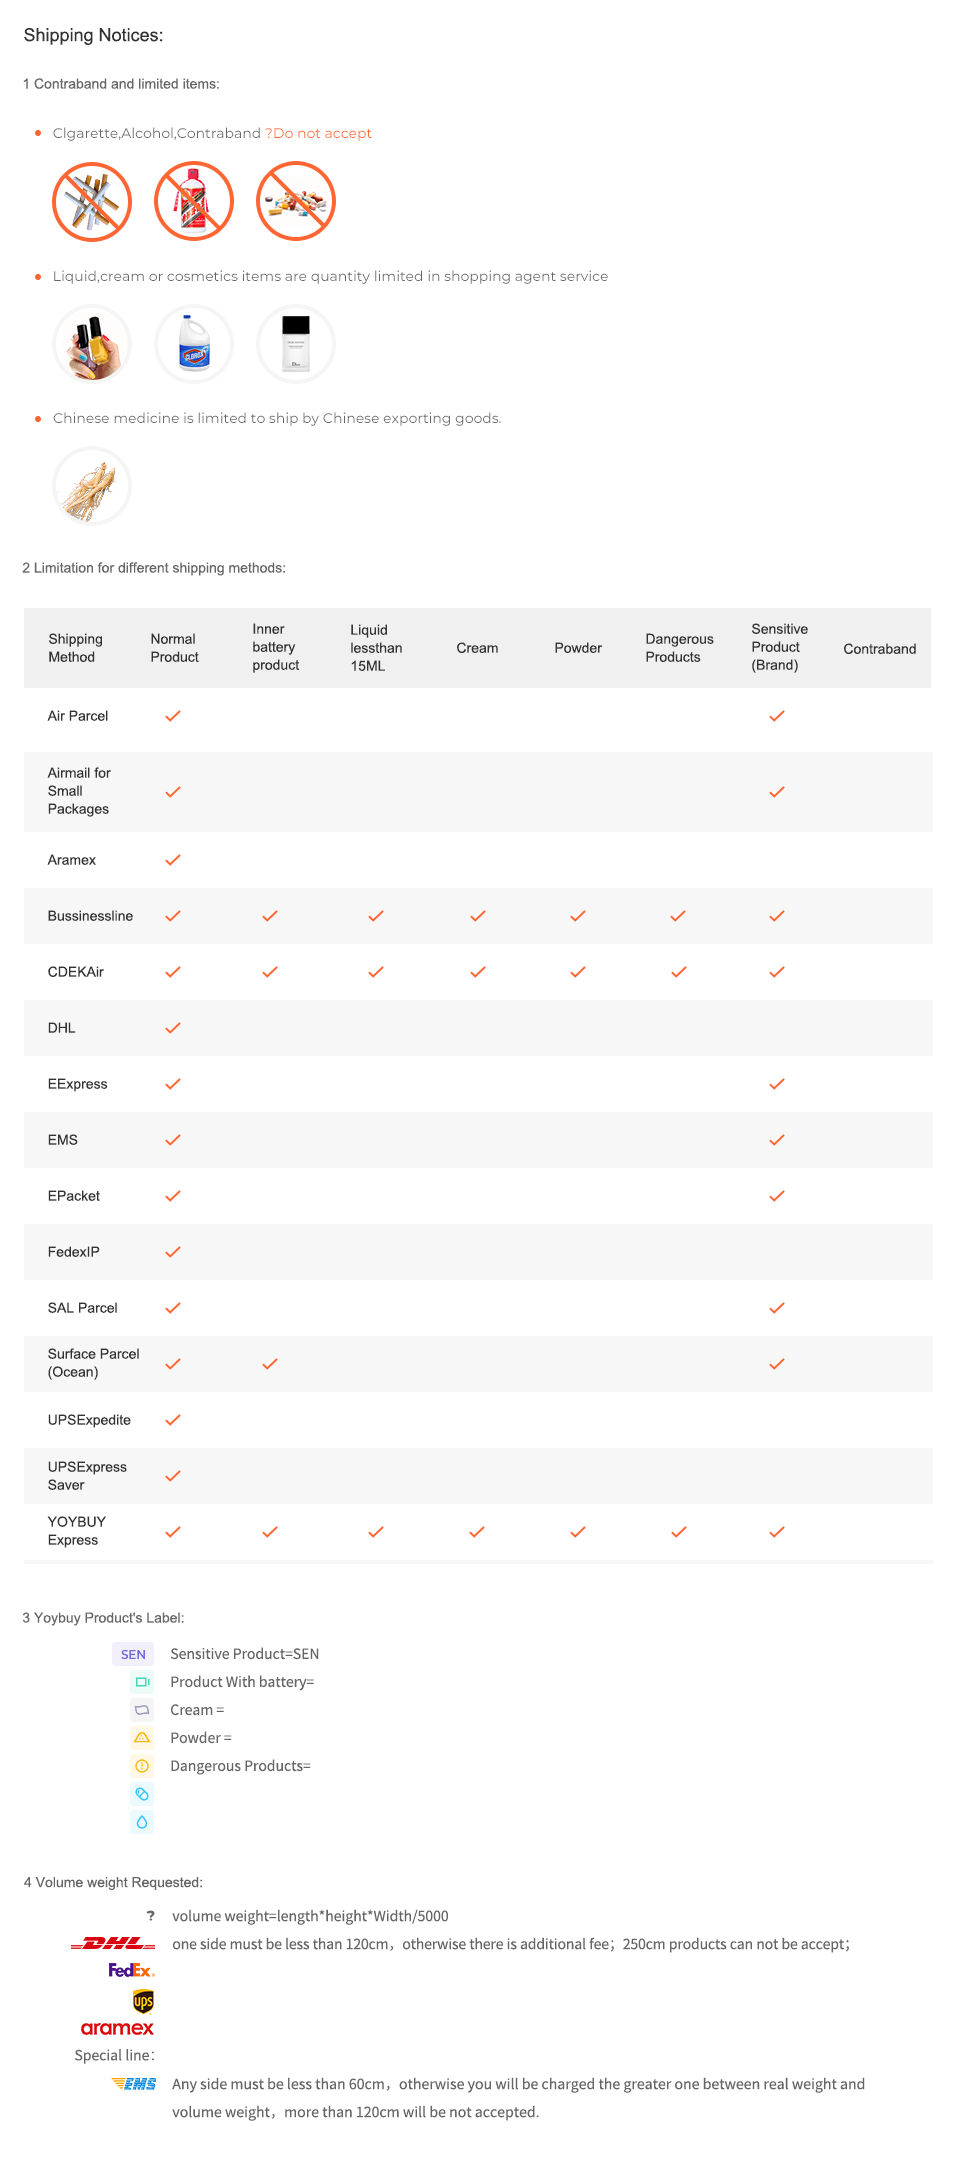
- 1pc 12V LED tail light with Scanning Signal light
- 15cm size with black casing. with super brighter totally 54pcs Amber LEDs
- with Scanning function
- Universal Flexible Scanning LED Turn Signal Tail Brake License Plate Light LED Flexible Scanning Strip Light and Running Tail Indicator Light for Motorcycle Bike ATV Car RV SUV
- easy operate ,with 1 year warranty


12V LED tail light with Scanning Signal light
included :1pc 26.5cm led Scanning Strip light bar 54SMD LED LED Flexible Turn Singal Strip Light and Running Tail Light with scanning function
1. DC12V operate
2. 26.5cm size with black casing.
3. totally 54pcs Amber LEDs
4. with Left & Right Scanning function( from middle to left, from middle to right)
|

|

|

|
|---|---|---|
|
Wire Connector Diagram: Black Wire: Common Ground Red Wire : Scanning From Middle to Left Yellow Wire: Scanning From Middle to Right |
totally 54pcs Amber 3528LEDs , with Left & Right Scanning function( from middle to left, from middle to right) waterproof led fexible led scanning led strip . |
easy install with 3m tape and flexible 3528 led chip |


BEST SELLERS

Product Description
12V LED tail light with Scanning Signal light
included :1pc 26.5cm led Scanning Strip light bar 54SMD LED LED Flexible Turn Singal Strip Light and Running Tail Light with scanning function
1. DC12V operate
2. 26.5cm size with black casing.
3. totally 54pcs Amber LEDs
4. with Left & Right Scanning function( from middle to left, from middle to right)
|
|
|
|
|---|---|---|
|
Wire Connector Diagram: Black Wire: Common Ground Red Wire : Scanning From Middle to Left Yellow Wire: Scanning From Middle to Right |
totally 54pcs Amber 3528LEDs , with Left & Right Scanning function( from middle to left, from middle to right) waterproof led fexible led scanning led strip . |
easy install with 3m tape and flexible 3528 led chip |


BEST SELLERS


Menu
-
B2B

-
Shopping Agent
-
Forwarding
-
Support
-
Brand Introduction
-
Login
Sign Out
-
Language English

-
Currency RUB
 Language
Currency
 Drag the image here, or
Click to upload
Tips: Only jpg, jpeg, png, webp
Drag the image here, or
Click to upload
Tips: Only jpg, jpeg, png, webp


Scan the QR code and use your phone to take a direct photo search.
×
